Adding a website
In SEO Perception, a website is created by linking your workspace to a Google Search Console property. You pick that property from a list after your Google account is connected—not by typing a separate URL in a second field.
Prerequisites
- An SEO Perception account and you are signed in.
- At least one connected Google Search Console account.
- Room under your plan’s website limit. Counts and tiers are summarized in Tiers, pages, and data retention.
Where to go in the app
Open the dashboard at /dashboard. In the Websites section, use the
Add Website button on the right side of the websites list controls.
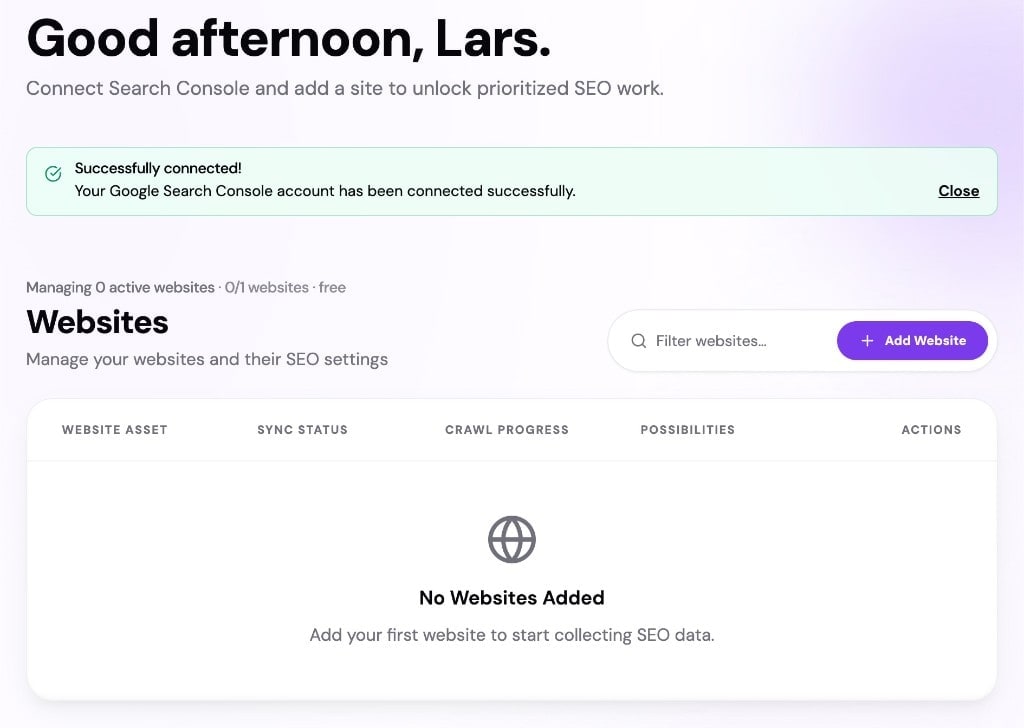
If you just connected Google Search Console, you should see a success message and the Add Website button available.
Steps
- Click Add Website to open the Add New Website picker.
- Select one or more properties with the checkboxes. You can only select up to your available website slots for your current tier.
- Click Add website (or “Add X websites” when multiple are selected).
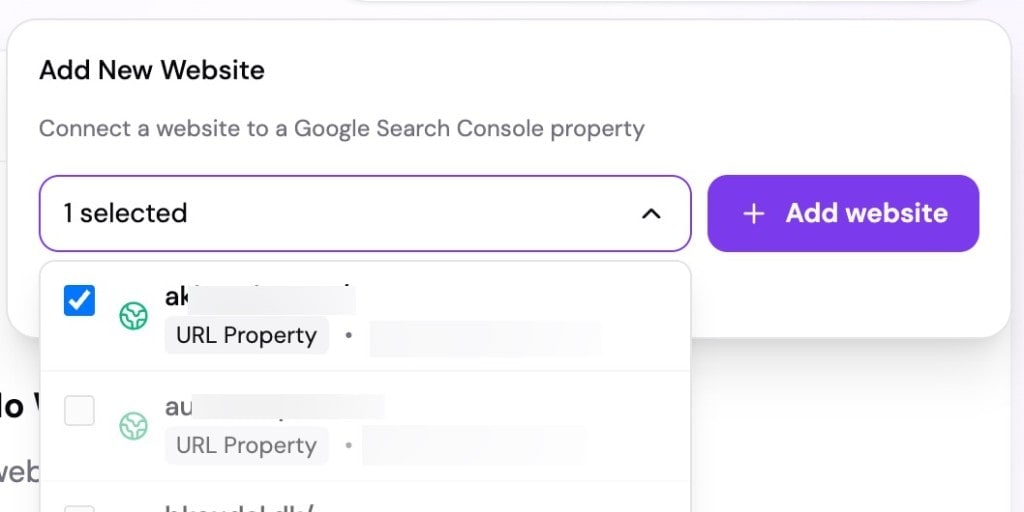
Each option in the list is a GSC property from your connected account (domain property or URL-prefix property). Choose the property that matches how you manage that site in Search Console.
If the property list is empty or you cannot add
-
No Google account connected yet. The page may prompt you to connect Search Console first. Use
/dashboard(Google Search Console accounts —#gsc-accounts) and Connecting Google Search Console. - No properties in Google for that login. Add and verify a property in Google Search Console, then refresh or reconnect if needed.
- All properties already added. Each Search Console property can only be tied to one website entry at a time in SEO Perception. If every property is already in use, the list may show a message such as that all properties are already connected—remove or adjust an existing site if you need to switch.
- Plan limit reached. Upgrade or remove a site when you have used all slots for your tier (see Tiers, pages, and data retention).
Permissions and access errors
Google requires sufficient access to the exact property (for example Owner or Full user), and the property type must match what you expect (URL-prefix vs domain). If collection fails, the app may point you to reconnect in GSC accounts or to Google’s Search Console permissions help—follow that guidance for the Google account that should control the property.
After you add a website
You should first see a confirmation notice that data gathering and crawling have started.

- Search Console data import starts first. We fetch the latest performance history for the property. For initial setup, we collect roughly the last 3 months and store it in weekly buckets (not day-by-day detail).
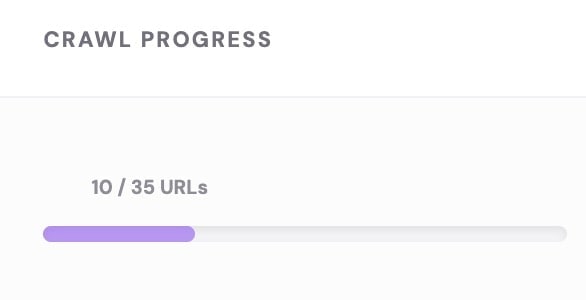
- Crawling starts in parallel as initial setup continues. We check URLs discovered from Search Console and URLs found by normal crawl discovery, up to your plan limits. Crawl errors do not count against your page cap.
- Processing time varies by site size and server response speed. It can take a few minutes or longer. We intentionally avoid overwhelming your server, because slower and steadier crawling gives more reliable results.
- You can usually start seeing early results within minutes, but wait until scan completion for full insights. We send an email when the initial crawl/data collection run is completed.
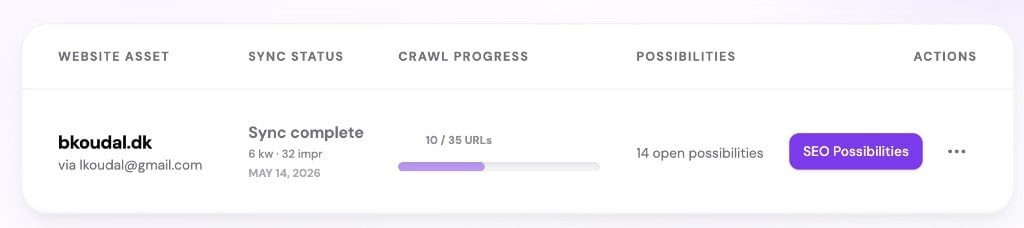
Manual actions from the websites row
Use the ⋯ menu on a website row for actions like recrawl, view facts, or PDF report. After you open a workspace page, the same quick paths are available in the shared project context bar, so you can keep switching between View facts, SEO Possibilities, and PDF Report for the selected website.
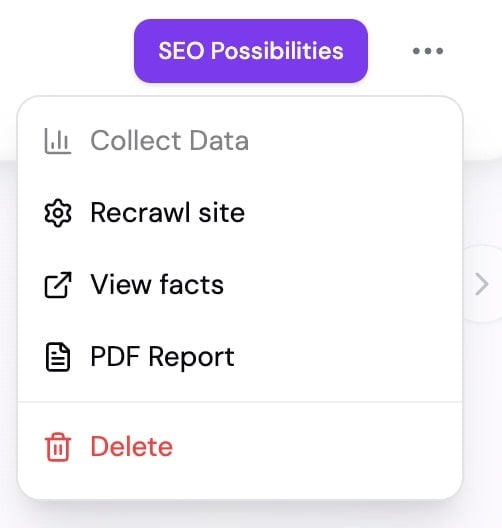
Manual Collect data and Recrawl site use cooldown limits. See Manual Search Console refresh & site recrawl cooldowns.
Exploration of crawl plus GSC in the UI is outlined in What you see on a website.